# PFSENSE 設定
# 目錄
- ### 安裝
[基本安裝](https://books.cpic.com.tw/books/pfsense/page/5fd0b)
- ### 基本設定
### 初次設定
- ### 進階設定
[阻擋網頁功能](https://books.cpic.com.tw/books/pfsense/page/b6d76 "阻擋網頁功能")
OPENVPN
- ### 特殊功能
# 安裝及初次設定
1. 安裝
1 安裝環境可以是X64 PC 或 VM
2 首先到官方網頁先下載安裝檔 [https://www.pfsense.org/download](https://www.pfsense.org/download)/,下載光碟ISO 或是 IMG檔都可以,ISO燒錄成光 碟,或使用ISO 或 IMG檔,寫入USB隨身碟,推薦軟體[ IMGNURN](https://www.imgburn.com/),[balenaEtcher](https://www.balena.io/etcher/)。
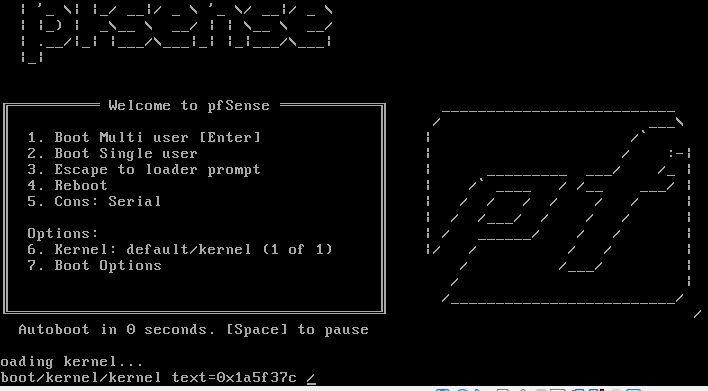
3 使用ISO或USB開機,
ENTER或等3秒直接跳過
[](http://books.cpic.com.tw/uploads/images/gallery/2022-09/KL4image.png)
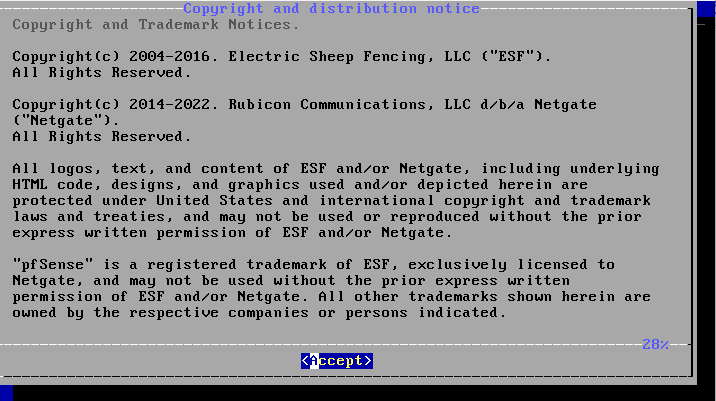
接受
[](http://books.cpic.com.tw/uploads/images/gallery/2022-09/ItUimage.png)
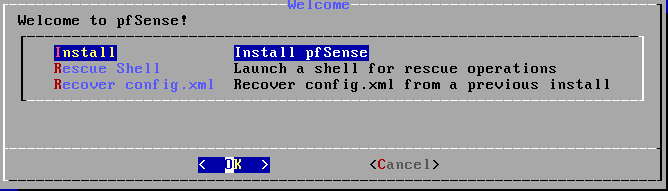
選 INSTALL
[](http://books.cpic.com.tw/uploads/images/gallery/2022-09/XrWimage.png)
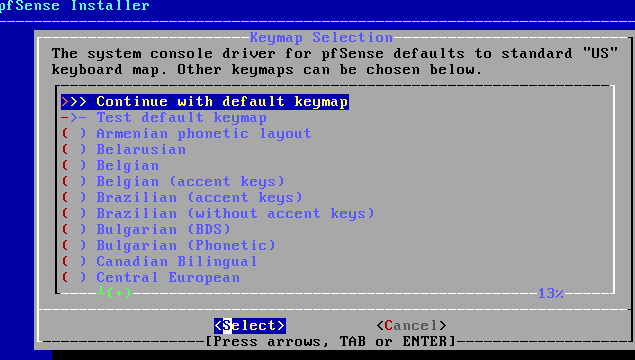
選預設鍵盤
[](http://books.cpic.com.tw/uploads/images/gallery/2022-09/Ob7image.png)
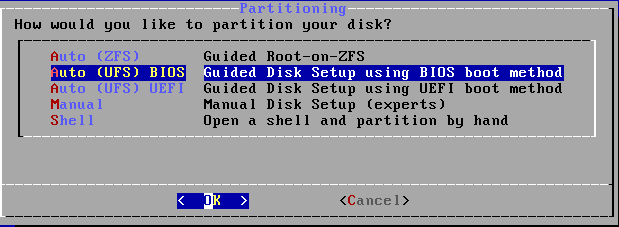
選UFS BIOS,新機可選 UFS-UEFI
[](http://books.cpic.com.tw/uploads/images/gallery/2022-09/Rinimage.png)
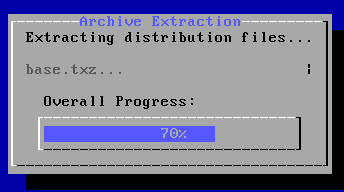
等待...
[](http://books.cpic.com.tw/uploads/images/gallery/2022-09/olEimage.png)"
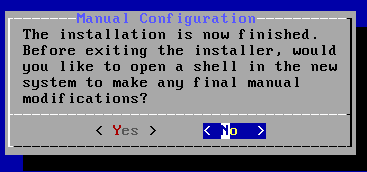
NO
[](http://books.cpic.com.tw/uploads/images/gallery/2022-09/Fmuimage.png)
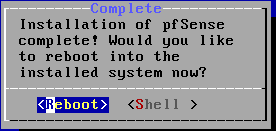
REBOOT
[](http://books.cpic.com.tw/uploads/images/gallery/2022-09/hkBimage.png)
移出光碟後重新開機,會開到初始畫面
2. 初次設定
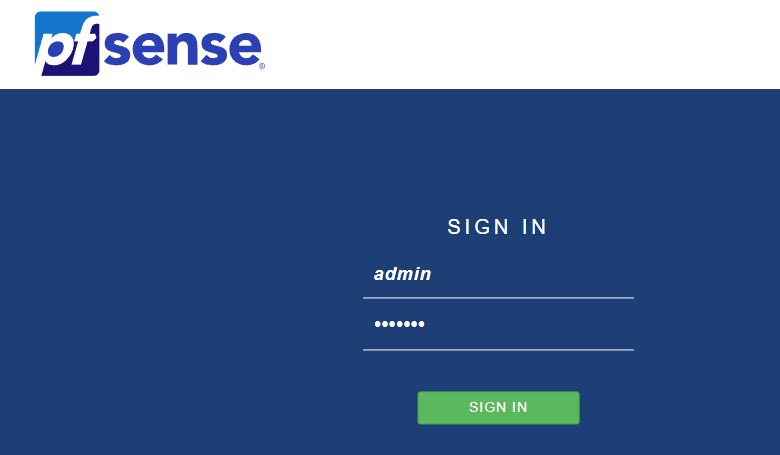
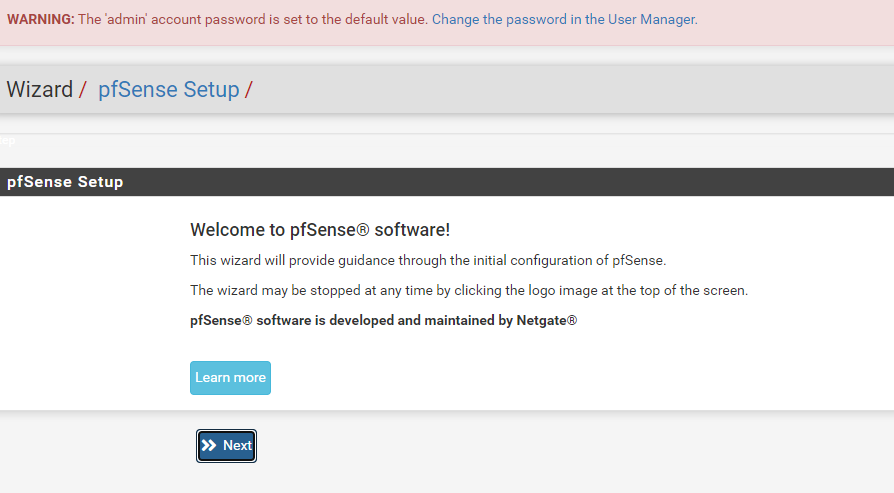
可以選擇本機畫面安裝,或網頁直接輸入IP 192.168.1.1(通常是第二個網路孔,第一孔DHCP,連不到先用本機安裝) 帳密 admin/pfsense 登入後進行安裝精靈。
網頁安裝 192.168.1.1
[](http://books.cpic.com.tw/uploads/images/gallery/2022-09/j5fimage.png)
跑安裝精靈 依次輸入相關資訊
[](http://books.cpic.com.tw/uploads/images/gallery/2022-09/qv6image.png)
本機安裝
[](http://books.cpic.com.tw/uploads/images/gallery/2022-09/dG2image.png)
創勁基本設定
Hostname:pfs
domain:對方網域 或隨便
密碼:
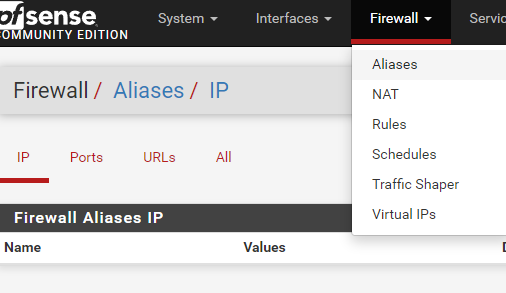
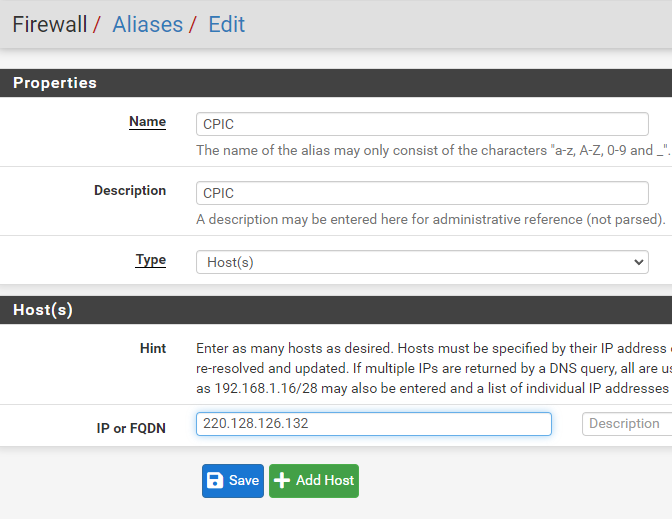
Firewall\\Aliases 新增創勁IP
[](http://books.cpic.com.tw/uploads/images/gallery/2022-09/qAYimage.png)
[](http://books.cpic.com.tw/uploads/images/gallery/2022-09/xPrimage.png)
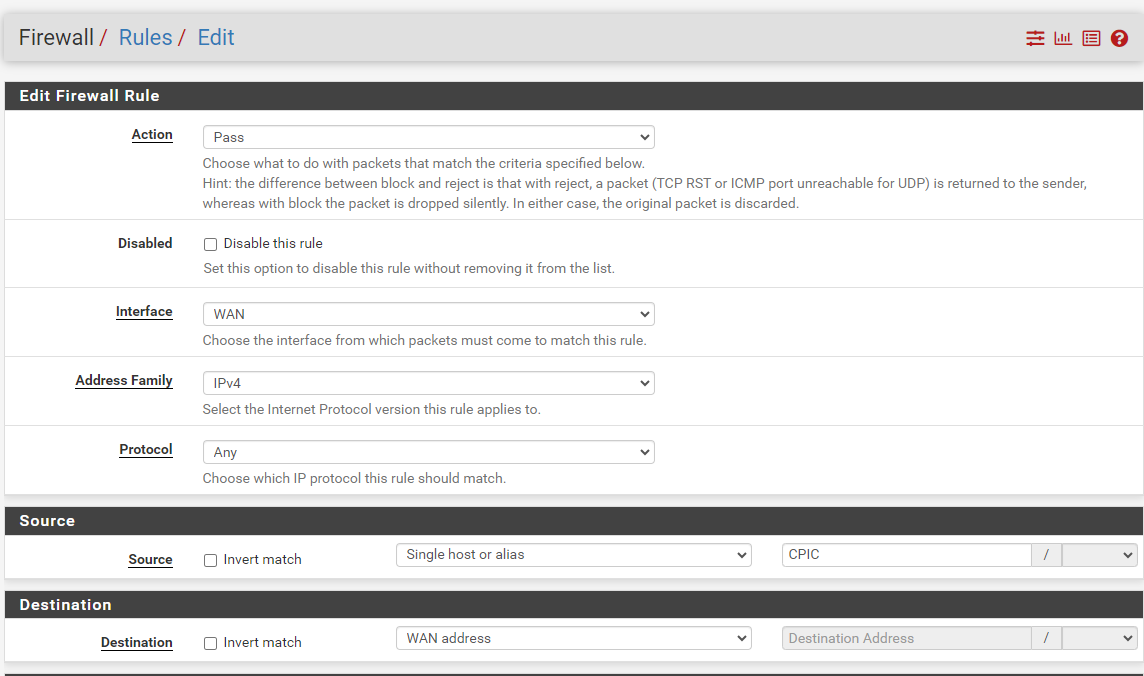
Firewall\\Rules 增加信任IP (CPIC)
[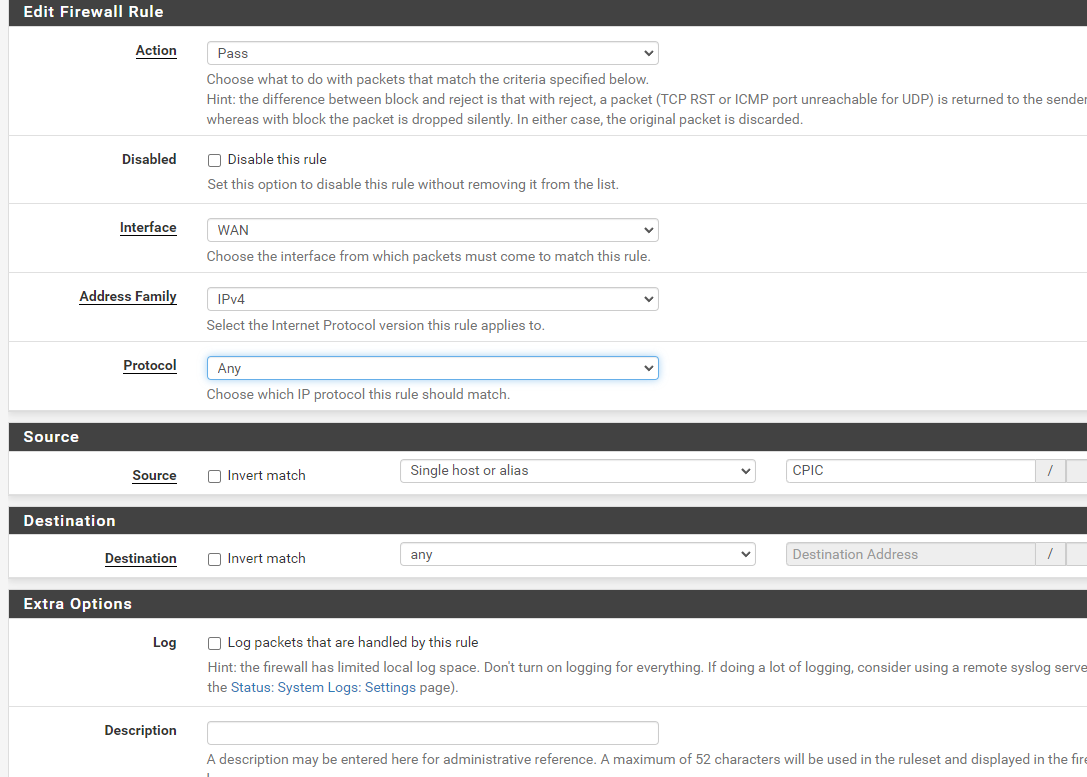](http://books.cpic.com.tw/uploads/images/gallery/2022-09/dbuimage.png)
3. 參考資料
英文
中文 [https://ithelp.ithome.com.tw/articles/10246505](https://ithelp.ithome.com.tw/articles/10246505)
[https://docs.netgate.com/pfsense/en/latest/install/download-installer-image.html](https://docs.netgate.com/pfsense/en/latest/install/download-installer-image.html)
# CPFS基本設定
### 基本設定
- #### 一般設定
- #### 進階設定
- #### [WAN IP 設定](#bkmrk-lan-ip-%E8%A8%AD%E5%AE%9A%C2%A0)
- #### [LAN IP 設定](#bkmrk-lan-ip-%E8%A8%AD%E5%AE%9A%C2%A0)
- #### DHCP 設定
- #### [存取限制設定開放WAN ADDRESS 給CPIC](#bkmrk-%E9%96%8B%E6%94%BEwan-address-%E7%B5%A6cpic)
-
#### 一般設定
System \\ General Setup
Hostname "客戶英文網域或拼音" \\\\主機名稱
Domain "cpic.local" \\\\ 網域
DNS Servers "1.1.1.1" "8.8.8.8" "168.95.1.1" \\\\DNS 可輸入多個
[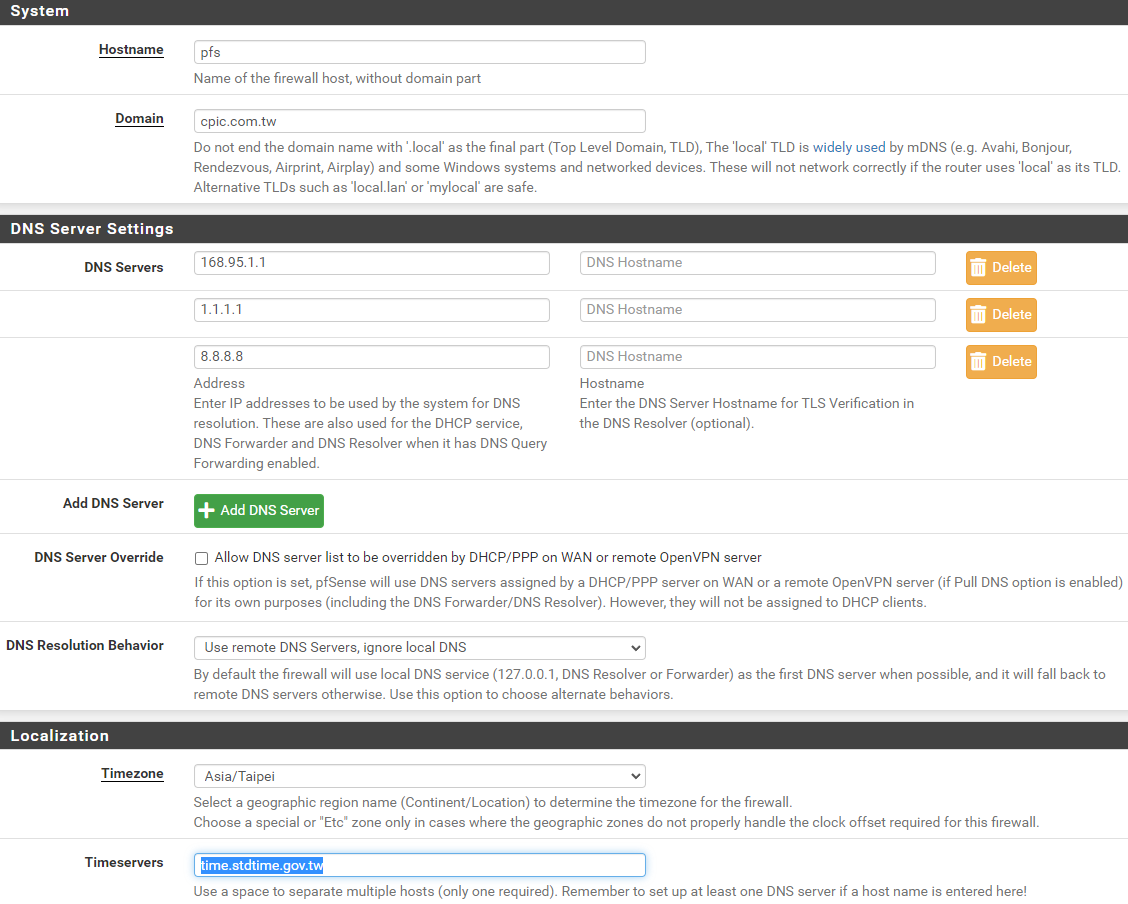](https://books.cpic.com.tw/uploads/images/gallery/2023-07/image.png)
#### 進階設定
System \\ Advanced
1. Admin Access
Protocol "https" \\\\
TCP port "8080" \\\\不佔用 80 443
[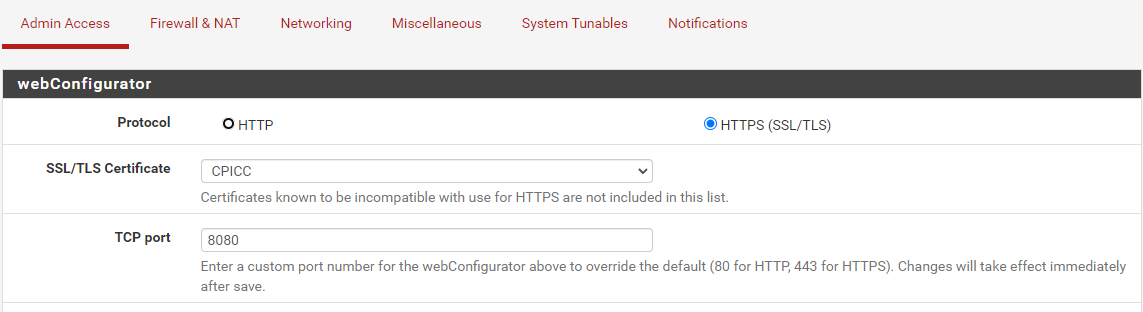](https://books.cpic.com.tw/uploads/images/gallery/2023-07/m0nimage.png)
2. Firewall & NAT
NAT Reflection mode for port forwards "NAT+PROXY" \\\\內網可存取內網NAT主機
Enable automatic outbound NAT for Reflection "勾選" \\\\自動建立NAT 防火牆RULES
[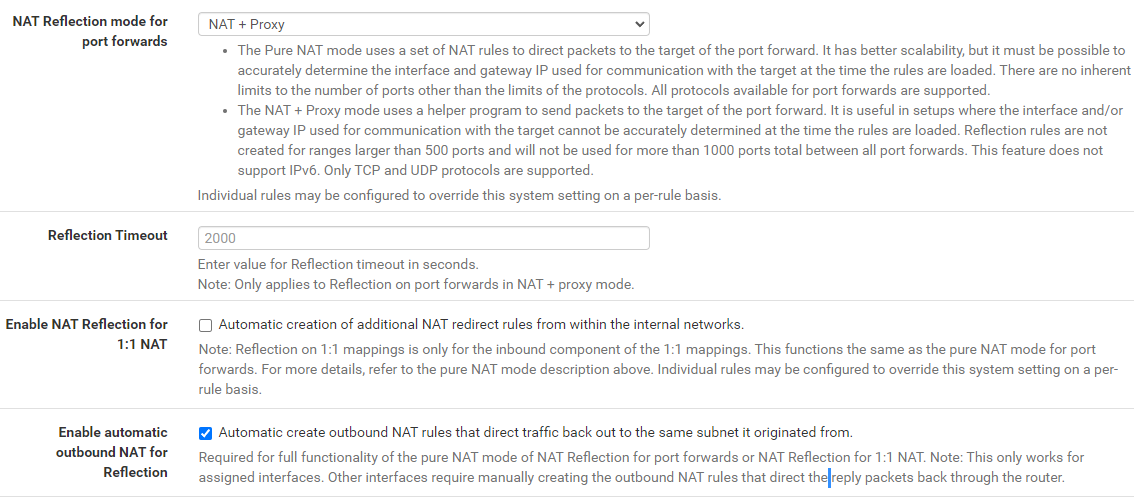](https://books.cpic.com.tw/uploads/images/gallery/2023-07/8t5image.png)
3. Notifications
Disable SMTP "不勾選"
E-Mail server "msa.hinet.net"
From e-mail address "xxx.yyy@msa.hinet.net"
Notification E-Mail address "alarm@cpic.com.tw" [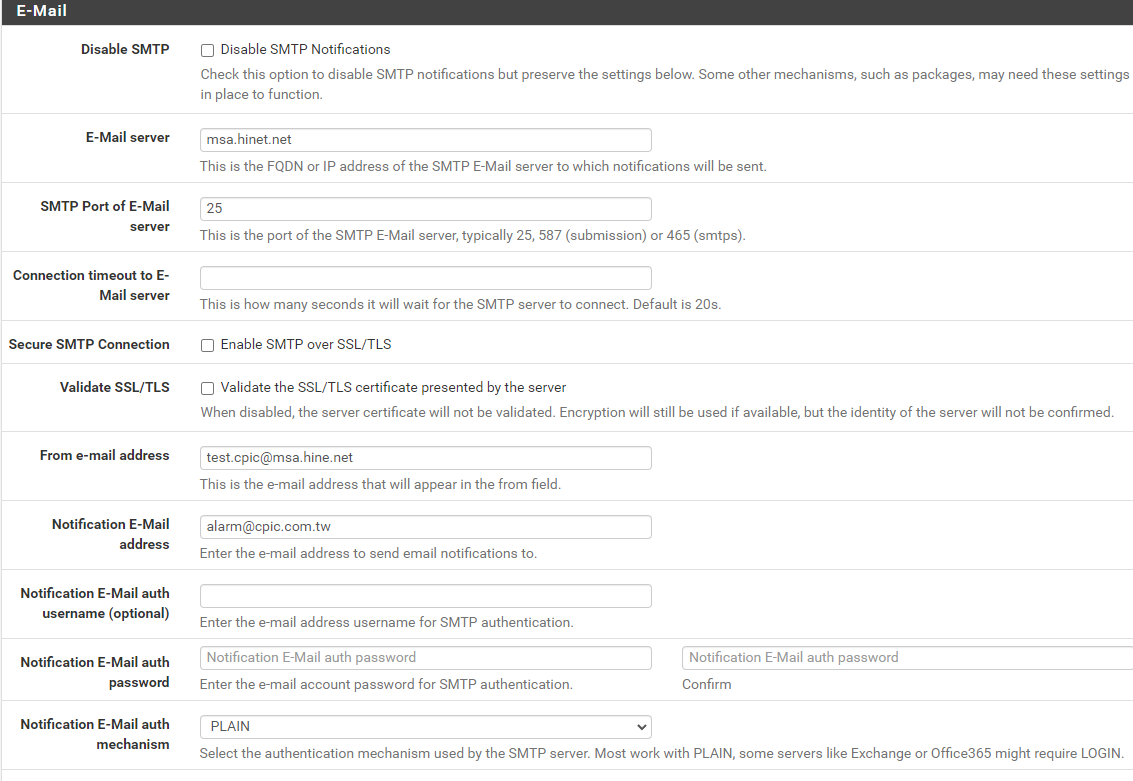](https://books.cpic.com.tw/uploads/images/gallery/2023-07/Sdaimage.png)
4. Networking
Allow IPv6 "不勾選" \\\\取消IPv6
[](https://books.cpic.com.tw/uploads/images/gallery/2023-07/umlimage.png)
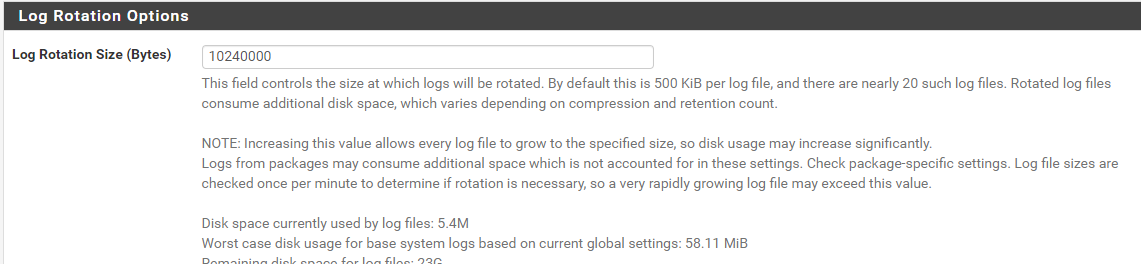
5. Status \\ System Logs \\ Settings
Log Rotation Size (Bytes) "10240000" \\\\設定log檔案大小為 10MB
[](https://books.cpic.com.tw/uploads/images/gallery/2023-07/5geimage.png)
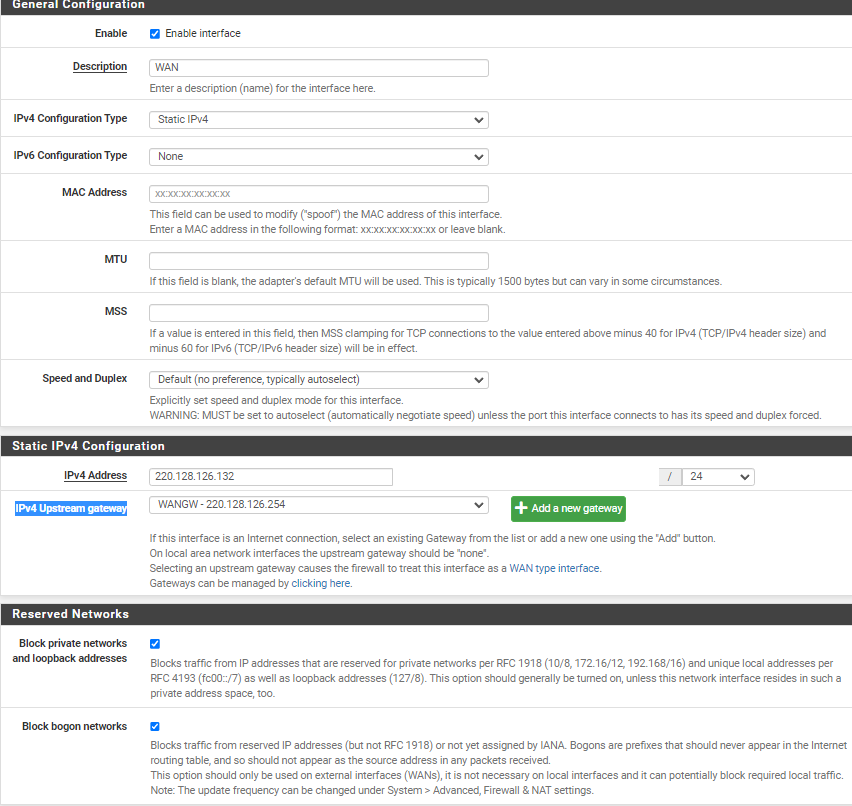
#### WAN IP 設定
Interfaces \\ WAN
IPv4 : DHCP/PPPOE/STATIC
IPv6 : Disable
Gateway: 有固定靜態-IP 要新增
Add a new gateway > 輸入 GW IP。
[](https://books.cpic.com.tw/uploads/images/gallery/2023-06/image.png)
ENABLE 勾選
IPv4 Configuration Type > STATIC PPPOE DHCP
IPv4 Address Mask IPv4 Upstream gateway
#### 開放WAN ADDRESS 給CPIC
#### LAN IP 設定
#### DHCP 設定
##### 設定Firewall [Aliases,](https://114.32.150.244:8080/firewall_aliases.php) 將公司IP 將公司IP 加入 [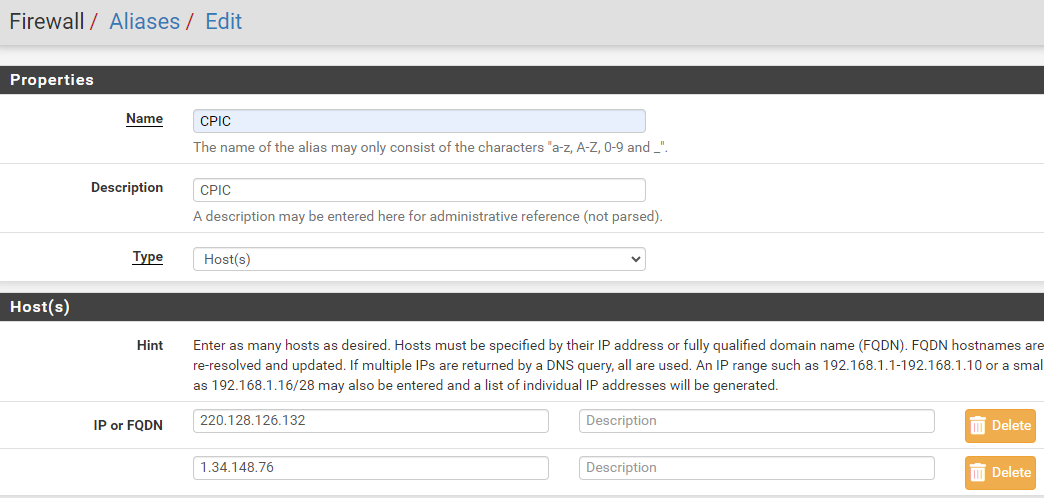](https://books.cpic.com.tw/uploads/images/gallery/2023-06/3J4image.png)
#### 防火牆規則設定允許CPIC
Firewall [\\ Rules \\ WAN ](https://114.32.150.244:8080/firewall_rules.php)允許所有:IPV4 **Protocol:ANY**
[](https://books.cpic.com.tw/uploads/images/gallery/2023-06/X3ximage.png)
# 進階設定
進階設定
# 阻擋網頁功能
### 阻擋網頁功能
以往Pfsense防火牆要設定封鎖某網站,要使用SQUID PROXY過濾或是透過套件pfBlockerNG封鎖DNS來達成,現在可用相對簡單方式。
查出要封鎖網站的所有相關網址
建議使用[https://www.netify.ai/](https://www.netify.ai/)
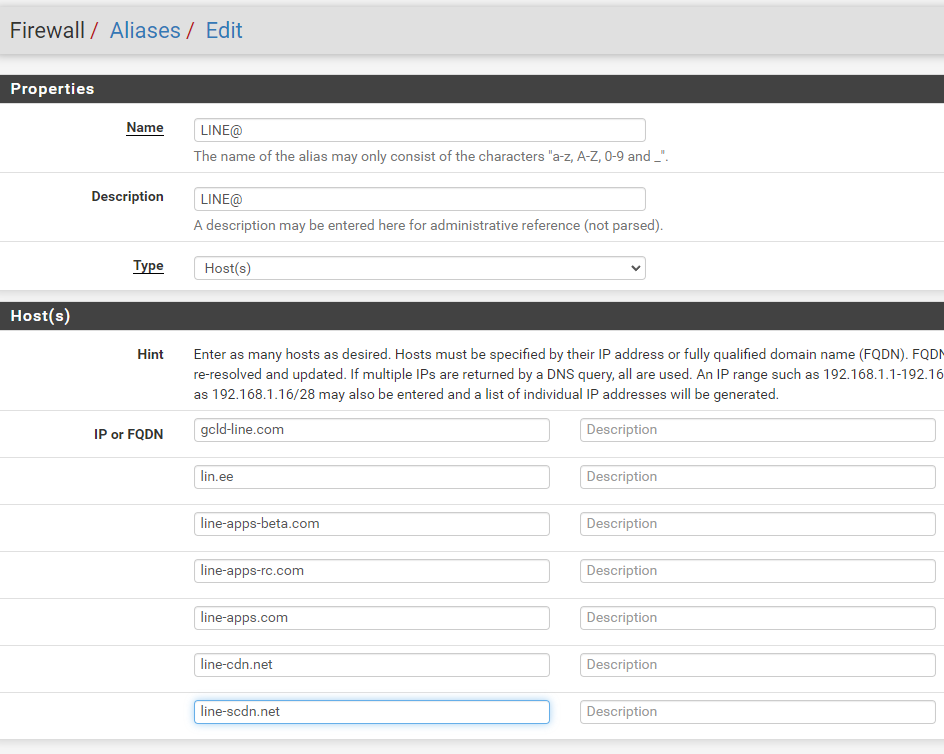
例如 line
#### PRIMARY DOMAINS
- [gcld-line.com](https://www.netify.ai/resources/domains/gcld-line.com)
- [lin.ee](https://www.netify.ai/resources/domains/lin.ee)
- [line-apps-beta.com](https://www.netify.ai/resources/domains/line-apps-beta.com)
- [line-apps-rc.com](https://www.netify.ai/resources/domains/line-apps-rc.com)
- [line-apps.com](https://www.netify.ai/resources/domains/line-apps.com)
- [line-cdn.net](https://www.netify.ai/resources/domains/line-cdn.net)
- [line-scdn.net](https://www.netify.ai/resources/domains/line-scdn.net)
- [line.me](https://www.netify.ai/resources/domains/line.me)
- [line.naver.jp](https://www.netify.ai/resources/domains/line.naver.jp)
- [linecorp.com](https://www.netify.ai/resources/domains/linecorp.com)
- [linemyshop.com](https://www.netify.ai/resources/domains/linemyshop.com)
- [lineshoppingseller.com](https://www.netify.ai/resources/domains/lineshoppingseller.com)
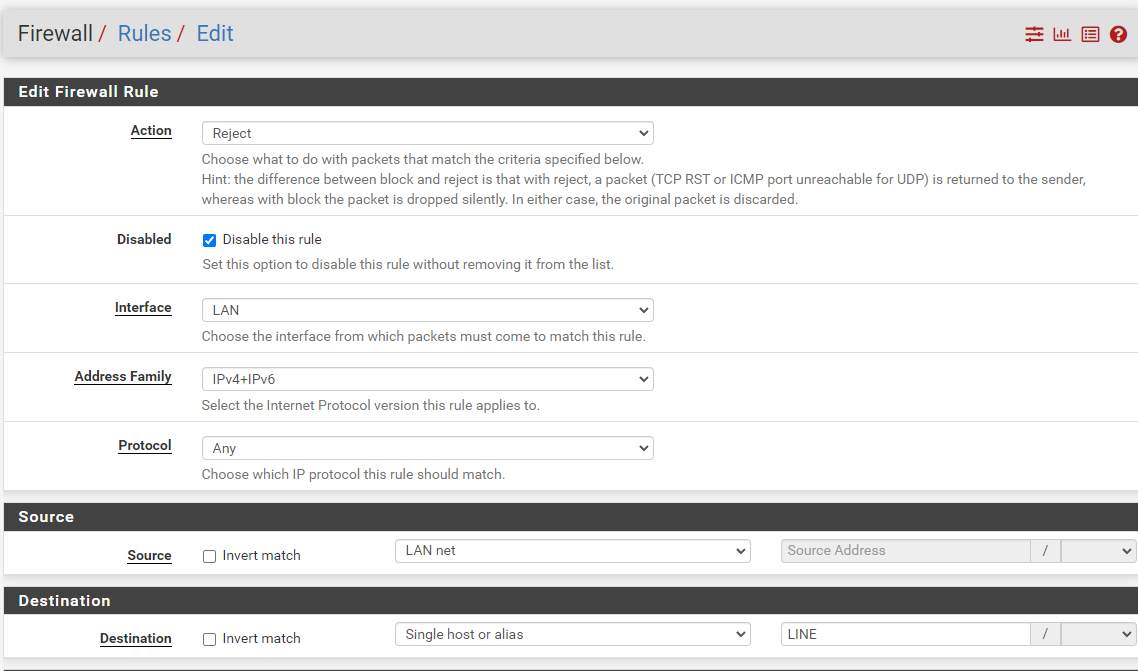
在aliase裡面新增所有網址
在規則封鎖
# OPENVPN
新增PACKAGE OPENVPN
初次使用精靈
建立本機使用者
使用外部驗證
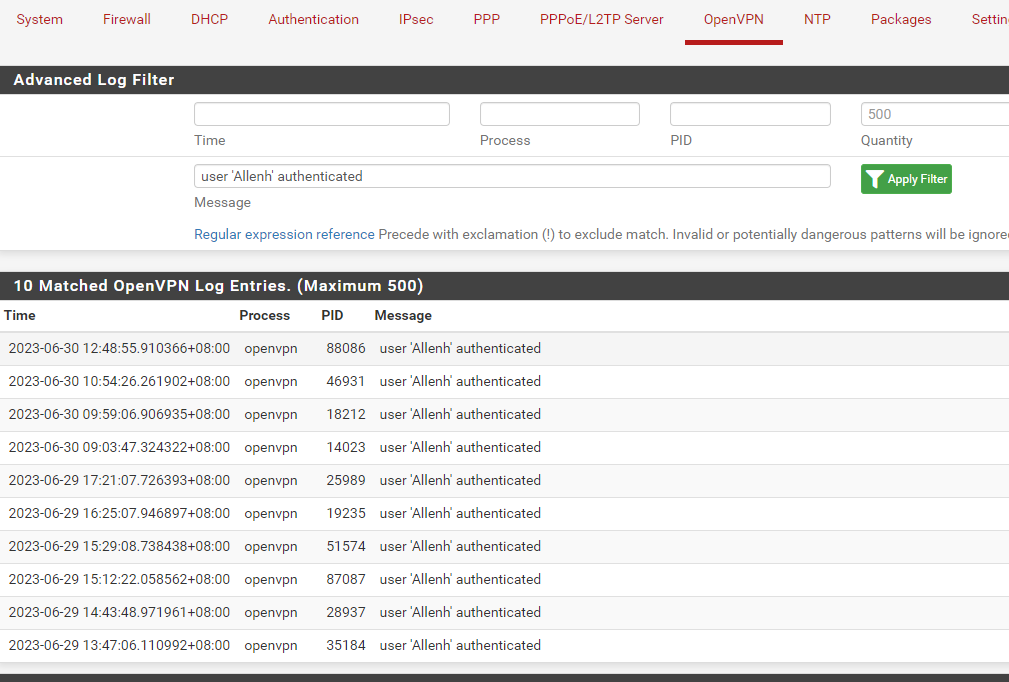
查詢登入紀錄
查詢登入紀錄
到 Status \\ System Logs \\ OpenVPN 處
使用FILTER功能,搜尋user登入紀錄
Message 輸入 `user 'username' authenticated`
[](https://books.cpic.com.tw/uploads/images/gallery/2023-06/PVSimage.png)
# 阻擋網頁功能-2
### 阻擋網頁功能-2
方法1如果失敗嘗試用方法2,方法1可能阻擋網頁有多個對外IP,可能就會失效。
- \*\*重導向DNS到 防火牆本身
- 利用防火牆DNS做阻擋。
- 或利用 PFBLOCK套件阻擋。
### 重導向DNS到 防火牆本身
讓CLIENT端查詢DNS 只能用防火牆IP
參考[原廠說明](https://docs.netgate.com/pfsense/en/latest/recipes/dns-redirect.html)
到 Firewall \\ NAT \\ Port Forward 建立規則
[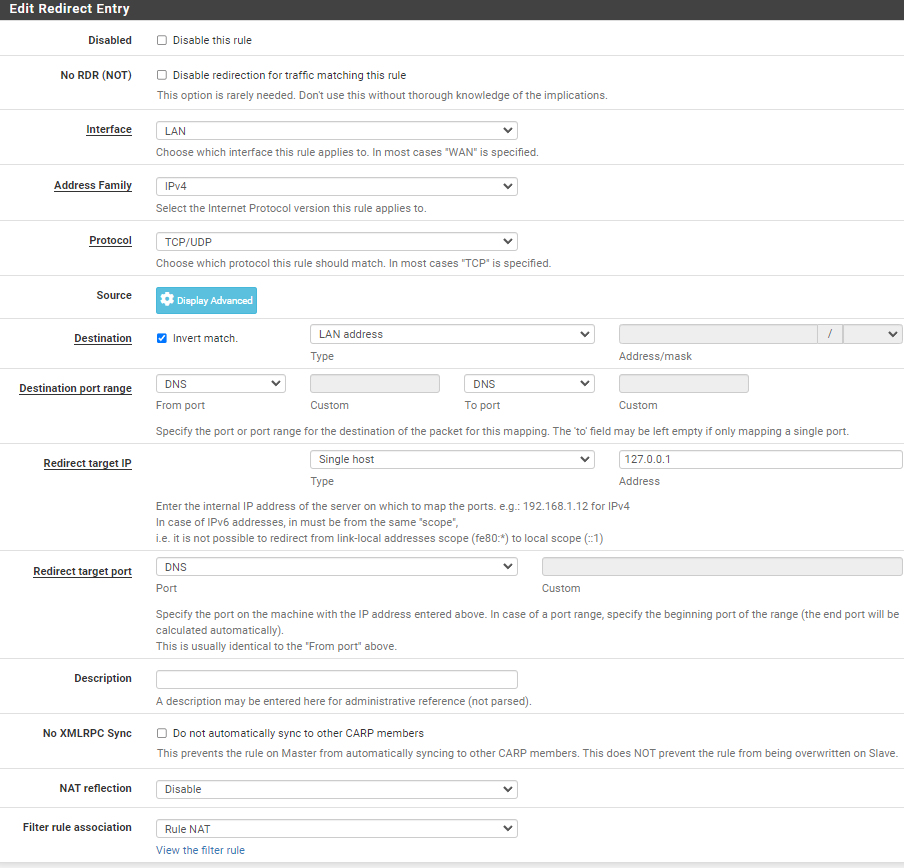](https://books.cpic.com.tw/uploads/images/gallery/2023-06/Xsximage.png)
### 利用防火牆DNS做阻擋
到 Services \\ DNS Resolver 最底下 Host Overrides 新增主機
IP ADDRESS 隨意輸入
[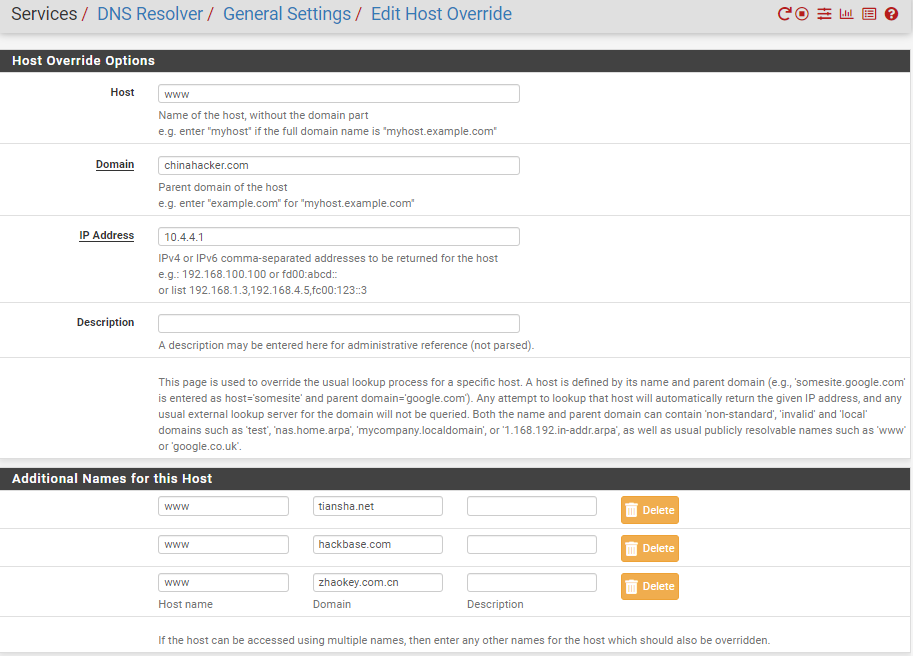](https://books.cpic.com.tw/uploads/images/gallery/2023-06/rUaimage.png)
# 百里助專案
## 客戶需求
- ### 觀看連線資訊
- ### 利用防火牆做阻擋。
- ### 或利用防火牆限速。
### 解決方案
- ### 觀看連線資訊
使用套件 ntopng安裝:
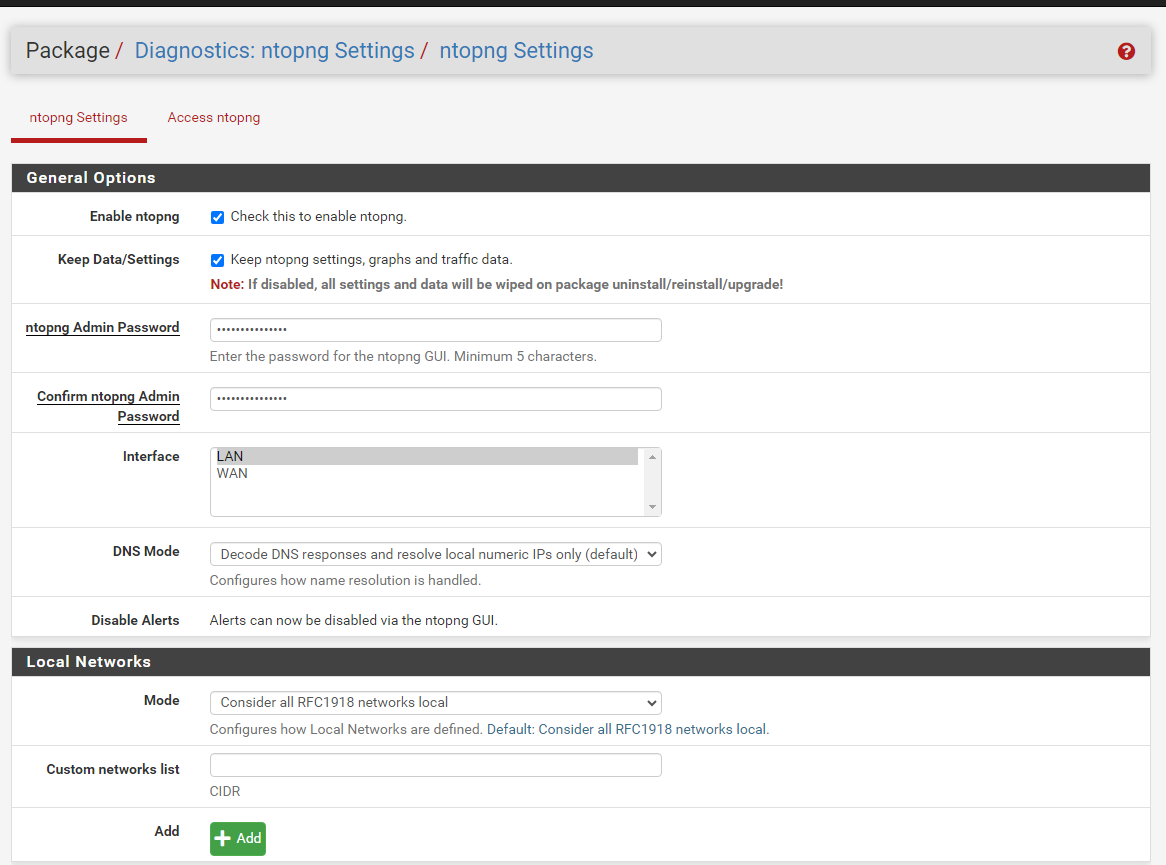
1 到 System \\ Package Manager \\ Available Packages 搜尋 ntopng,點選安裝。
2 到 Diagnostics \\ ntopng Settings \\ ntopng Settings進行設定
##### 勾選 Enable ntopng , Keep Data/Settings
再設定 ntopng 網頁密碼,等下登入會用到。
[](https://books.cpic.com.tw/uploads/images/gallery/2023-08/image.png)
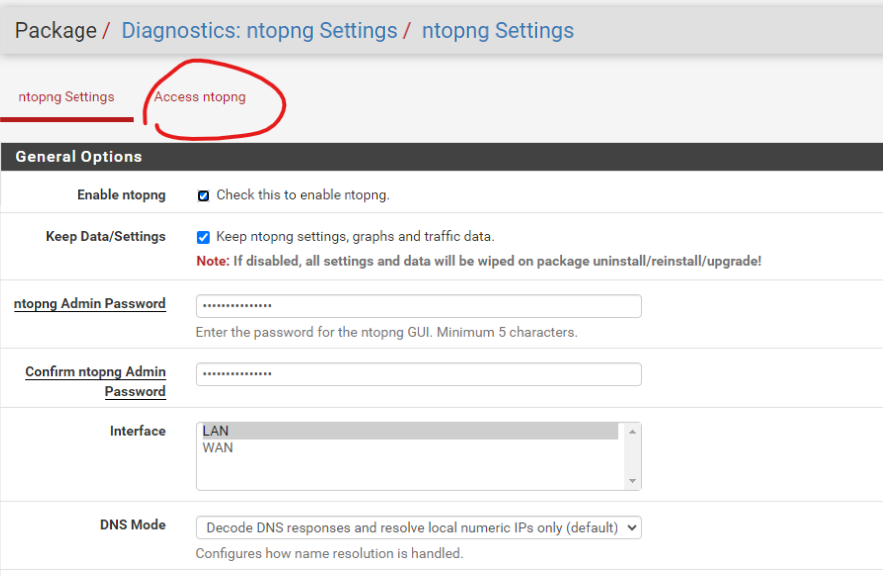
#### 3 網頁登入 點選設定旁 Access ntopng
[](https://books.cpic.com.tw/uploads/images/gallery/2023-08/M9simage.png)##### 畫面如下
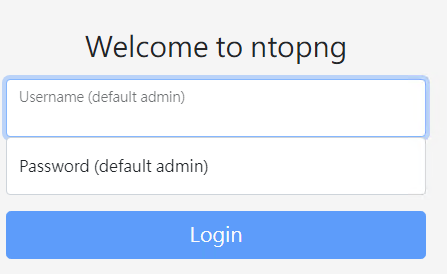
輸入帳密 admin/剛剛設定的密碼
##### [](https://books.cpic.com.tw/uploads/images/gallery/2023-08/Fymimage.png)
到 flow \\ live 看及時流量
[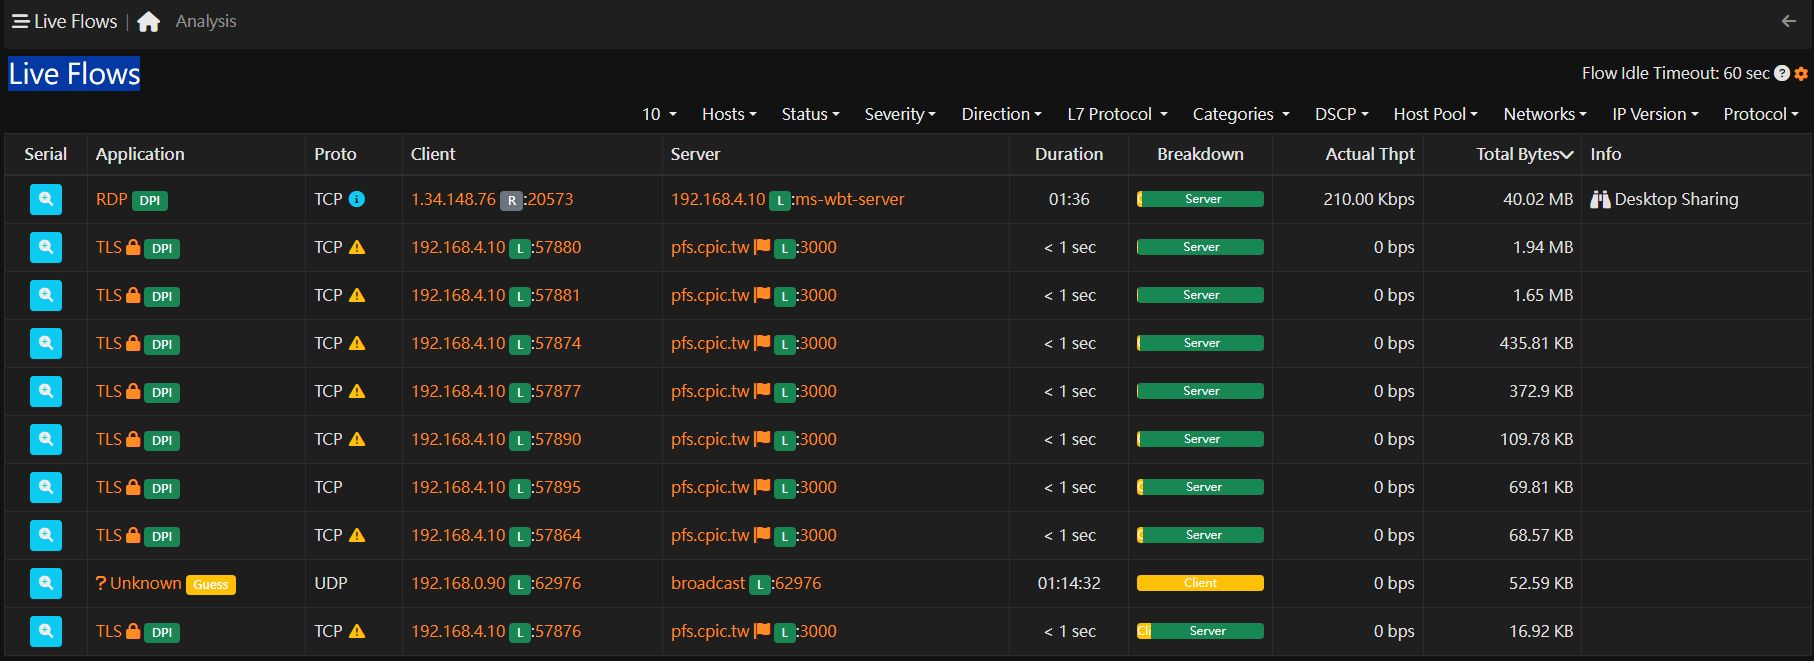](https://books.cpic.com.tw/uploads/images/gallery/2023-08/3aeimage.png)
##### 篩選區網IP Local Only,選出高流量IP 點入可以看CLIENT細項。
[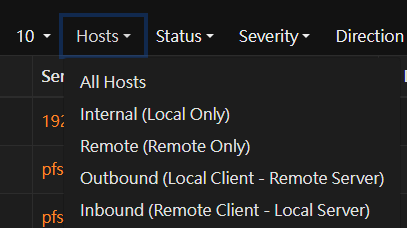](https://books.cpic.com.tw/uploads/images/gallery/2023-08/zoeimage.png)
[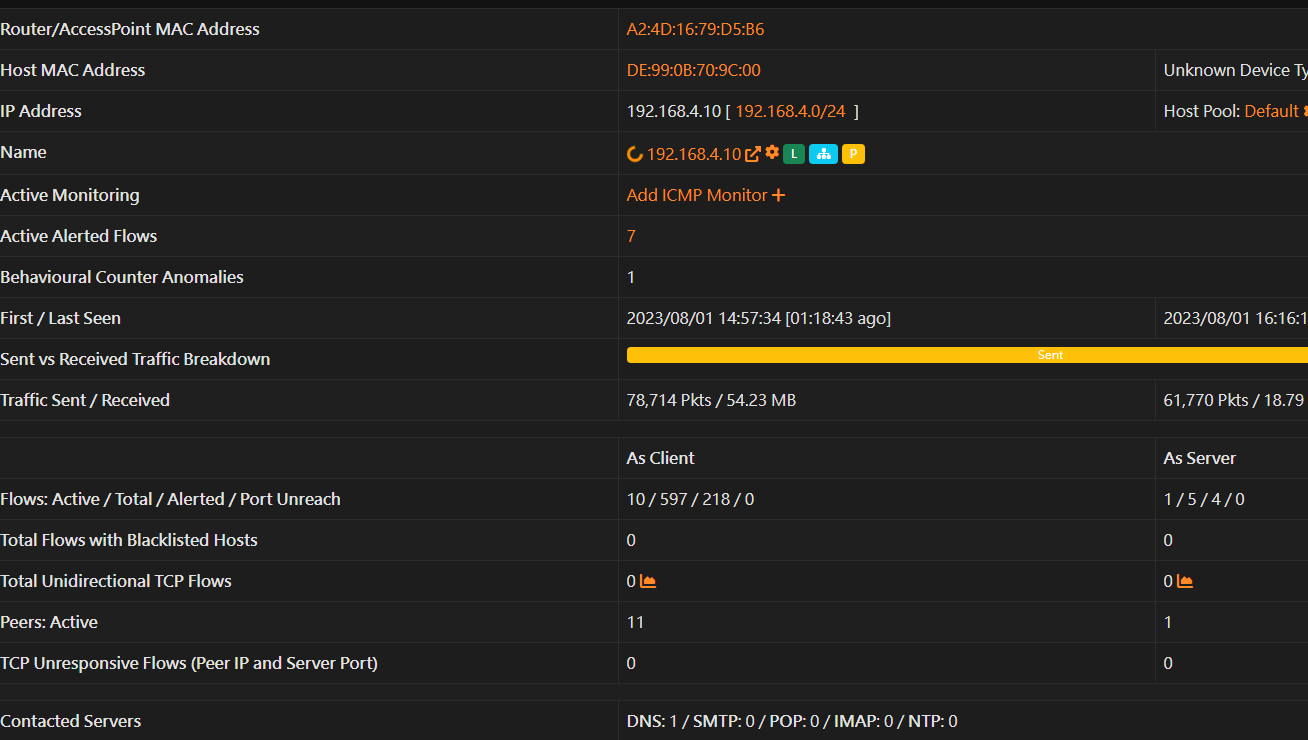](https://books.cpic.com.tw/uploads/images/gallery/2023-08/HmXimage.png)
- ### 利用防火牆做阻擋。
1. ##### 到 Firewall \\ Aliases \\ IP 新增群組
分別新增 black flowcontrol
# WIREGUARD Site to Site
WIREGUARD Site to Site
參考
[https://docs.netgate.com/pfsense/en/latest/recipes/wireguard-s2s.html](https://docs.netgate.com/pfsense/en/latest/recipes/wireguard-s2s.html)